
How to run Python code in HA

Goal
Run Python code in Home Assistant. In my case, this code does not have any interaction with HA services or entities. It just needs to do things.
Problem
Python in HA has a specific set of libraries (for security and stability reasons). And how good that is, it doesn’t help me running my Python code which often requires the requests library and other libraries. Examples
- Code with requests library that make generic REST API calls
- Code with other libraries (like webexteamssdk) to send messages to the (free) Cisco Webex client.
- Code that talk to Cisco Webex Video devices to make change configuration and read environmental data like noise, temperature, humidity, presence
- Code that extract recording counts from my surveillance platform
When you want to install a library in HA the following message appears: (in short: you cannot install the package you need)
➜ pip install requests error: externally-managed-environment
  × This environment is externally managed
  ╰─> The system-wide python installation should be maintained using the system package manager (apk) only. If the package in question is not packaged already (and hence installable via "apk add py3-somepackage"), please consider installing it inside a virtual environment, e.g.:

$ python3 -m venv /path/to/venv
$ . /path/to/venv/bin/activate
$ pip install mypackage
To exit the virtual environment run: deactivate.
The virtual environment is not removed and can be re-entered by re-sourcing the activate file. (see “source activate” command later in this post).
Automatically manage virtual environments? consider using pipx (from the pipx package)
Solution
There is a number of solutions to this problem.
1. Install Pyscript
2. Install Appdaemon
3. Install using Alpine APK ✅
4. Install in VENV ✅
1. Pyscript
Altough great, it is not easy. There are many dependencies but it has a tight integration with HA. NICE: your Python code and functions become available as a “service”. However, I only want to execute a Python script with a custom library. Pyscript documentation.
2. AppDaemon
Altough great, it is not easy. Not easy to setup lacking some documentation and examples. Plus it feels like it has a big impact on the system for something that for me only needs to do 1 thing: execute a Python script with a custom library. AppDaemon documentation.
XNOTE: soon (in the next 2 weeks) I will do some testing on a BLANK Home Assistant platform to verify described behavior.
3. Install using Alpine APK ✅
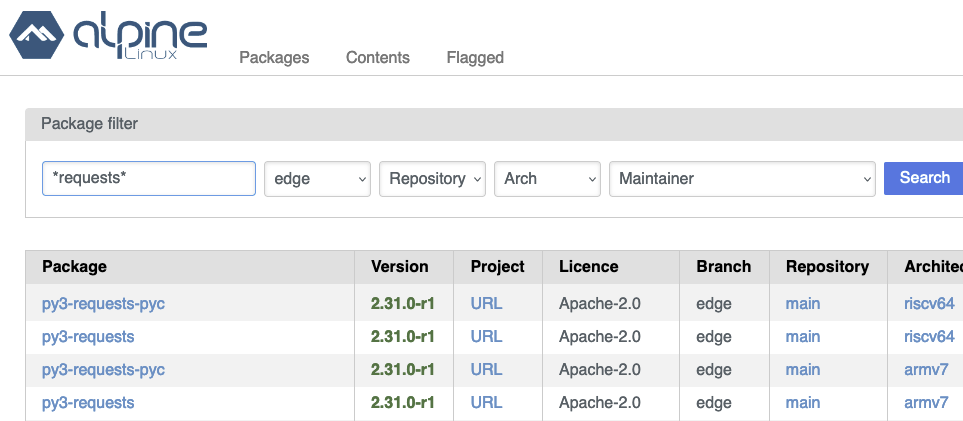
This works FINE for specific packages: search HERE and use ‘*‘ before and after your searchstring. Example:
!UNTIL I have done more testing, execute Python scripts that use this method with the “command_line” method, not “shell_command”!
NOTE: Prepare to make the python code work:
1. create this folder: /config/python_scripts
2. in configuration.yaml, add a line: python_script:
3. you may have to restart HA to activate this setting
To install a package from the Alpine, open an SSH session to Home Assistant and type:
apk add py3-requests
Not all libraries that you can find on pypi.org can be installed through this method. If you have this requirement, check out the solution in chapter 4 below.
ANY python code that you put in the folder /config/python_scripts/ will become available as a service. So no need for shell scripts or shell_commands.
service: python_script.helloworld
data: {}
Any code in subfolders will not appear as a service. Those you can call as a shell_command (see shell_command examples at the end of chapter 4) or as a command_line sensor (for example) that you can call using “Home Assistant Core Integration: update entity” with the command_line sensor as an argument. TIP: don’t use ‘-‘ dashes in your filenames. They cause problems.
COMMENT if you would like this to be clarified in a separate post!
4. Use VENV in HA ✅
This is where you setup a “virtual environment” (VENV) within HA. Don’t worry, it sounds scarier than it is. It is an isolated (‘separated’) Python environment that you can activate, run a script, and deactivate.
Great for “open-execute-close” type of applications. Which is what I need!
PREPARE:
1. Create this folder: /config/python_scripts
2. In configuration.yaml, add a line: python_script:3. You may have to restart HA to activate this setting
SETUP: Folder/prompt: blue – command: red – venv: purple
#1 ➜ python_scripts/ mkdir mypythonenv
#2 ➜ python_scripts/ python -m venv mypythonenv
#3 ➜ python_scripts/ . mypythonenv/bin/activate
#4(mypythonenv) ➜ python_scripts/ mypythonenv/bin/python -m pip install webexteamssdk
____Collecting webexteamssdk
____…plus lots more text…
____[notice] A new release of pip is available: 23.2.1 -> 23.3.2
____[notice] To update, run: pip install –upgrade pip
#5(mypythonenv) ➜ python_scripts/ mypythonenv/bin/python -m pip install –upgrade pip
____Requirement already satisfied: ./mypythonenv/lib/python3.11/site-packages (23.2.1)
____Collecting pip
____…+ lots more text…
#6 (mypythonenv)➜python_scripts mypythonenv/bin/python wbxsendfile/py_webexsendfile.py
____sendmessage: image location: [‘/media/camera/cam_frontdoor_bell.jpg’]
#7 (mypythonenv) ➜ python_scripts/ deactivate
#8➜ python_scripts/
- Create folder for the virtual environment
- Add a virtual environment (venv) in that folder
Note that it can take a while before it finishes but you don’t see anything happening. Be patient. - Activate the newly created virtual environment
NOTE: don’t forget the “.” (dot) at the beginning of the command! - Install library. The prompt changes to show that you are ‘inside’ the virtual environment. When you install libraries they won’t be installed in the ‘official’ HA python setup.
This is where I install the “webexteamssdk” library - Upgrade pip. The platform shows there is a “pip” (package manager) upgrade available. Run the command to update “pip”.
- Execute Python code that uses the library installed in step 4. Note that first I use the path to the virtual Python version installed in folder mypythonenv/bin/. Then a space and the path to the Python code to be executed.
Everything went fine. - Deactivate to exit the virtual environment.
- ready! 👍
Next: run the code
NOTE that we’re still talking about python code that needs specific libraries that are not available through the Alpine apk. Find a way to “automatically” go through the process of
- activating venv
- running .py
- deactivating venv
You have 2 choices:
#1 Use a Shell Script
Create a file “doorbellwebex.sh” in the “/config/python_scripts” folder with the following command:
cd /config/python_scripts/mypythonenv/bin && source activate && python /config/python_scripts/wbxsendfile/py_webexsendfile.py && deactivate
Execute this .sh file with a Home Assistant shell_command:
shell_command:
 webex_send_dbellimg: "source /config/python_scripts/doorbellwebex.sh"
#2 WITHOUT Shell Script ✅
OR you put the entire command inside the shell_command, skipping the .SH file
shell_command:
 webex_send_dbellimg: "cd /config/python_scripts/mypythonenv/bin && source activate && python /config/python_scripts/wbxsendfile/py_webexsendfile.py && deactivate"
In both of the above cases
To test it run this through the “Developer Tools” / service (https://HA_IP:8123/developer-tools/service)
Service: shell_command.webex_send_dbellimg
data: {}
Enjoy!
DJ